


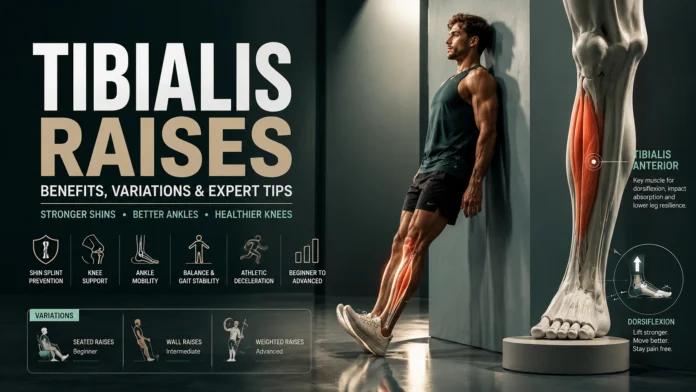
Most individuals naturally concentrate on strengthening their quadriceps, hamstrings, and calves while developing lower-body strength. But the tibialis anterior, a vital but sometimes overlooked muscle, runs directly down the front of your shin.
Weak shins may be the source of persistent shin splints, persistent knee discomfort, or limited ankle movement. The best exercise to correct this imbalance is a tibialis rise. This guide explains the fundamental health advantages of these exercises, how to scale them to your level of fitness, and how to practice them precisely.
💡 Quick Takeaways:
The tibialis anterior, or front of the shin, is the target.
- The main advantages include reducing knee stress, preventing shin splints, absorbing lower-body impact, and increasing ankle mobility.
- It is intended for runners, athletes, those recuperating from foot or knee ailments, and senior citizens seeking to enhance their balance.
- No initial equipment is required (it may be done against a wall), however it can be scaled with weights or a tibialis bar.
- The suggested regimen is two to three times a week, with two to three sets of fifteen to twenty-five regulated repetitions.
What Are Tibialis Raises?
The muscle that pulls your toes up toward your shins, or dorsiflexion, is called the tibialis anterior. This muscle lengthens to absorb the shock when your foot meets the ground after contracting to raise it so you don’t trip after each stride, run, or leap.
An solo exercise called a tibialis raise involves repeatedly flexing this muscle against resistance (either external weight or bodyweight). The tibialis is often weak in comparison to the powerful, hefty calf muscles behind it because the front of the lower leg is seldom targeted by current footwear and regular exercise regimens. One of the main causes of lower-leg injuries is this disparity in strength.
How to Do a Tibialis Raise
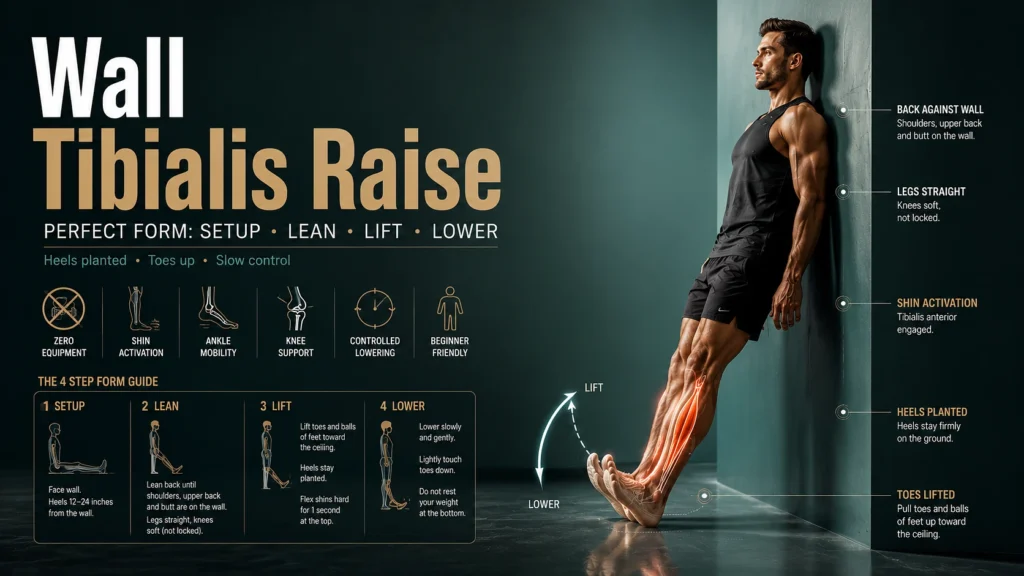
The beauty of the basic tibialis raise is that it requires zero equipment and can be performed anywhere. Here is how to execute a standard Wall Tibialis Raise with perfect form:
- The setup is to face a solid wall with your back to it. Your heels should be between 12 and 24 inches from the wall.
- The Lean: Bend your upper body back until your shoulders, upper back, and butt are flush on the wall. Do not forcefully lock out your knees; instead, keep your legs perfectly straight.
- The Lift (Concentric Phase): Pull your toes and the balls of your feet as high as you can toward the ceiling while keeping your heels firmly planted on the ground. At the top of the exercise, flex your front shin muscles firmly for a single second.
- The Lower (Eccentric Phase): Return your feet to the floor slowly and gently. Before beginning the following repetition, try to only gently touch the ground with your toes; do not allow your weight to rest at the bottom.
Tip: The further your feet are from the wall, the harder the exercise becomes. To make it easier, step closer to the wall.
Key Health Benefits of Tibialis Raises
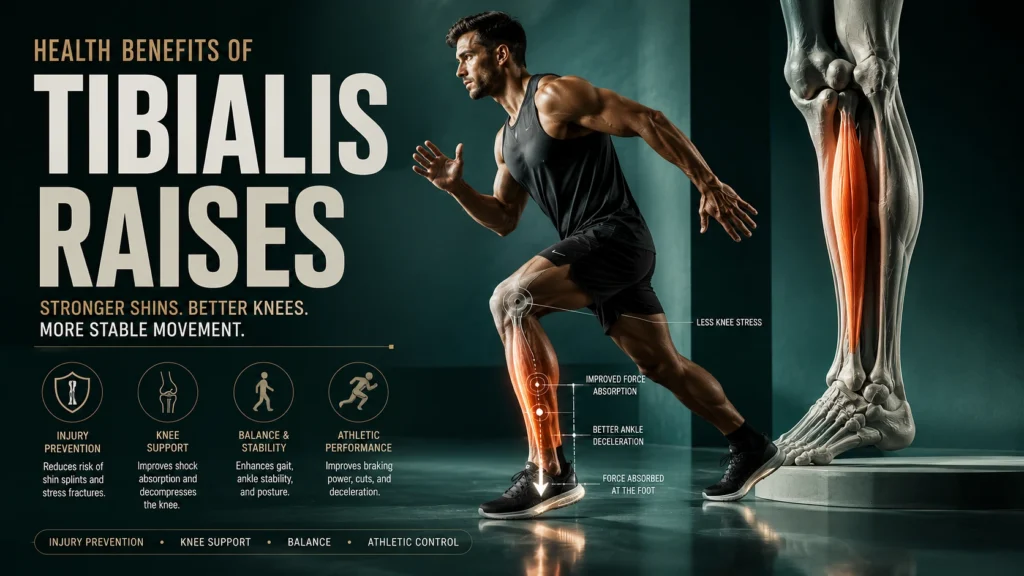
Consistently strengthening the front of your shins yields massive dividends for both daily functional movement and athletic longevity.
1. Robust Injury Prevention
Runners and hikers are particularly prone to lower-leg stress fractures and shin splints (medial tibial stress syndrome). They happen when the surrounding muscles are unable to withstand the amount of pounding absorbed by the bones and connective tissues. By acting as a barrier, stronger tibialis muscles absorb that kinetic energy before it harms your tendons and bones.
2. Deeper Knee Support and Decompression
A straightforward fact has gained popularity because to “knees over toes” training: force absorption begins at the foot and progresses upward. The impact of each step travels directly to your knee joints if your shins are weak and your ankles are rigid. Tibialis raises directly reduce patellar tendonitis and chronic knee stress by enhancing ankle deceleration.
3. Enhanced Balance and Gait Stability
As we become older, our ability to swiftly raise our feet over barriers diminishes, which increases the risk of accidents and falls. By strengthening your shins, you may enhance your overall stride, stabilize the ankle joint from side to side, and develop stronger fundamental posture from the bottom up.
4. Explosive Athletic Performance
The ability to halt, cut, and change direction swiftly is equally as important in athletics as acceleration speed. The main “brake” of the lower body is the tibialis anterior. Athletes may preserve their ACLs during high-impact sports, make sharper cuts, and decelerate more quickly with stronger brakes.
Popular Variations
You can easily scale the difficulty of tibialis raises to match your current baseline, moving from rehab contexts to heavy strength training.
- Beginner Seated Tibialis Raises: Take a seat on a solid chair with your heels flat on the floor and your knees bent at a 90-degree angle. Bring your toes up to your shins. This version is ideal for active recovery or early-stage rehabilitation since it eliminates a substantial amount of body weight.
- Wall Tibialis Raises (Intermediate): This exercise employs your body weight and leverage against a wall, as explained above. It may be greatly adjusted by just changing where your feet are placed.
- Weighted/Bar Raises (Advanced): Progressive loading must finally be used in order to really increase muscle and tendon resilience. With your feet dangling off, take a seat on the edge of a raised bench. To add plate weight to your toe rises, you may use a customized tibialis bar (Tib Bar), an ankle strap connected to a cable machine, or a small kettlebell clamped between your feet.
Expert Tips for Optimal Training
To get the most out of this exercise without causing overuse injuries, keep these coaching cues in mind:
- Prioritize Time Under Tension: Avoid the temptation to rapidly bounce your feet up and down. The eccentric component the slow, 2-to-3-second lowering of your toes is where the magic happens for tendon remodeling and structural muscle growth.
- Start Slow and Embrace the Burn: Because this muscle is rarely isolated, it will accumulate lactic acid and burn very quickly. Begin with body weight and aim for higher volume: 2 to 3 sets of 15 to 25 repetitions, focusing on a clean, full range of motion.
- Combine with Mobility Work: If you have tight, restricted calves, achieving a full upward flex of the foot will be difficult. To maximize your results, supplement your tibialis raises with regular calf stretches and weighted ankle rockbacks.
- Consult Dedicated Resources: If you are using this exercise to bounce back from an injury, it helps to follow verified protocols. Explore comprehensive movement science platforms like Physiopedia for anatomical breakdowns, or check out tailored running recovery guides from Runner’s Connect to see how to program these into a broader mileage routine.
References
- Bhusari, N., & Deshmukh, M. (2023). Shin Splint: A Review Article. Cureus, 15(1), e33905.
- Dantas, E. H. M. (2025). Stride Mechanics and Strength Analysis of Lower Limbs in Runners with Medial Tibial Stress Syndrome vs. Asymptomatic Runners. MDPI.
- Flandry, F., & Hommel, G. (2011). Normal Anatomy and Biomechanics of the Knee. Sports Medicine and Arthroscopy Review, 19(2), 82–92. https://pubmed.ncbi.nlm.nih.gov/21540705/
- Franklyn-Miller, A., Roberts, A., Hulse, D., & Foster, J. (2012). Biomechanical overload syndrome: defining a new diagnosis. British Journal of Sports Medicine, 48(6), 415–416.
- Galbraith, R. M., & Lavallee, M. E. (2009). Medial tibial stress syndrome: conservative treatment options. Current Reviews in Musculoskeletal Medicine, 2(3), 127–133.
- Juneja, P. (2024). Anatomy, Bony Pelvis and Lower Limb: Tibialis Anterior Muscles. StatPearls. NCBI Bookshelf.
- Padua, D. A. (2014). Knee injury prevention: Hip and ankle strategies. Lower Extremity Review Magazine.